Prepping the Gumstix
Up until this point, you have been making the image on your desktop or laptop computer and haven't even touched the Gumstix. But now you will transfer the compiled image to the Gumstix computer via a serial link.First, we will transfer the image into the 64 MB RAM of the Gumstix. Then we will copy the information from RAM into the Gumstix's flash memory, which will make the changes permanent - at least until the next flash!

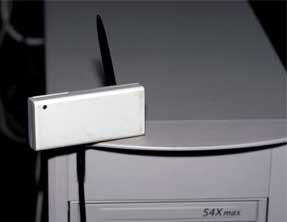
Figure 4: Gumstix connected via Serial cable
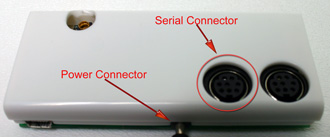
NOTE: Be extremely careful when plugging in the power and serial connectors. I broke off the power connector very easily and had to solder it back onto the Gumstix. It may be easier to pull the power adapter from the wall, when you need to power down the Gumstix rather than disconnecting and reconnecting the power plug from the Gumstix jack.

Figure 5: Gumstix power and serial connectors
(click image to enlarge)
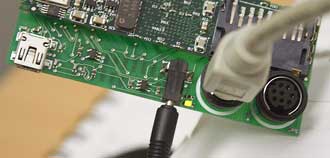
Start by plugging both the power and serial connectors into the Gumstix' jacks, but leave the Gumstix' power wart unplugged.

Figure 6: Gumstix power and serial connectors connected
(click image to enlarge)
Fire up the minicom terminal program on your LInux machine by typing
minicom
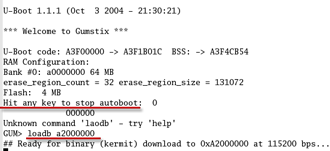
at the command prompt of your Linux machine. Plug in the power to the Gumstix and its green power light will turn on. The Gumstix will start booting, and in a few seconds you should see startup messages on the screen of your Linux machine. You need to interrupt the boot process and enter what is called the "U-Boot" mode, by hitting any key during the boot sequence (Figure 7).

Figure 7: Gumstix boot messages
(click image to enlarge)
The default settings in minicom should get you connected to the Gumstix, but If you are having trouble and need to change the settings, press Control+A and then Z, after starting minicom. This will take you to the settings configuration screen where you can change the settings to the following:
115200 baud 8N1 NOR VT102 no parity no flow control terminal settings - ANSI Backspace - BS status line - enabled D - Newline delay - 0 ms
According to this Gumstix Wiki page, u-boot is the Gumstix' built-in bootloader that performs first-pass initialization of the hardware, and then loads and jumps to the Linux kernel. u-boot provides a low-level way of accessing various devices on the gumstix before the full operating system is loaded.
Type in
loadb a2000000
which tells the Gumstix that an image is about to be transferred via kermit. At this point you can exit the minicom program.