Transferring and flashing the Image
It's now time to transfer the image to the Gumstix RAM and then copy the image to its flash memory. This two step process is much safer than directly transferring into flash. Do the following:
1) Start Kermit by typing kermit at the command prompt on your Linux machine2) In the Kermit command-line configure the serial port by entering each of the following commands at the command prompt. Enter the commands exactly as shown and press the "enter" key after each line:set prefixing allset file type binaryset parity noneset carrier-watch offset speed 115200set line /dev/ttyS0connect3) Go back to the Kermit command line via ctrl+C4) Entersend root_fs_arm
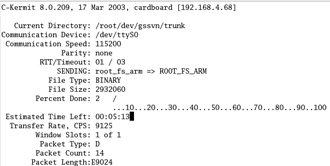
Kermit will start transfering one packet at a time (Figure 8).

Figure 8: Transferring the image
(click image to enlarge)
Since the transfer is running only at 115200 kilobits per second, it can take several minutes to complete. When the transfer is done, you can exit kermit. The kernel image is now sitting in the Gumstix' RAM.
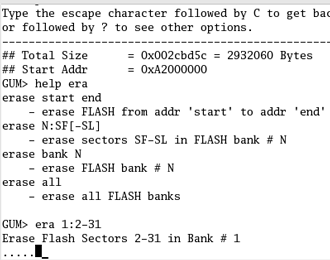
Since the Gumstix ships with a preloaded flash, you will have to erase it. Start minicom again and at the GUM> prompt enter (Figure 9)
era 1:2-31

Figure 9: Erase the flash
After the flash is erased, flash the new kernel via the following commands:
cp.b a2000000 40000 ${filesize}fsload a2000000 boot/uImage
Make sure you enter the correct number of zeros!
After the kernel is loaded, type
reset
to reboot the Gumstix.
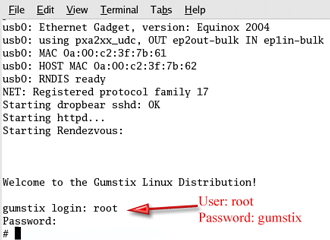
With the serial cable still connected and minicom running, you will see the bootup screen after restarting the Gumstix. The login is root and the password is gumstix. At the prompt, you will be able to do most everything that you can do in Linux, such as entering an ls to view a directory.
