Note: This procedure is recommended as a last resort and should not be attempted unless directed by a technical support expert. It may be necessary if an upgrade fails. If you do proceed, ensure you have the latest drivers available to install once the uninstall process has completed.Windows Vista* provides several methods to obtain information regarding the wireless adapter and driver on your computer.
- Start籆ontrol Panel籗ystem and Maintenance籗ystem籇evice Manager籈xpand Network Adapters in the right pane籋ighlight and right-click wireless adapter籔roperties籇river tab
- Right-click the 'Computer' icon located on the Desktop籆lick Manage籋ighlight Device Manager籈xpand Network Adapters in the right pane籋ighlight and right-click wireless adapter籔roperties籇river tab
- Start籆ontrol Panel籒etwork and Internet籒etwork and Sharing Center籑anage wireless networks籄dapter Properties籆onfigure籇river tab
- Start籒etwork籒etwork and Sharing Center籑anage wireless networks籄dapter Properties籆onfigure籇river tab
- Right-click mouse on System Tray icon (2 computer monitors image at lower right of screen)籒etwork and Sharing Center籑anage wireless networks籄dapter Properties籆onfigure籇river tab
Note: Digital Signer should show Microsoft as the signer for officially released drivers.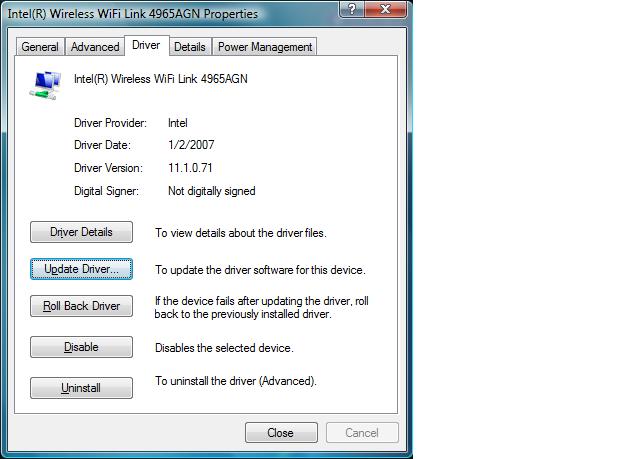
- Click Uninstall.
- Check the 'Delete the driver software for this device' box to confirm uninstall.

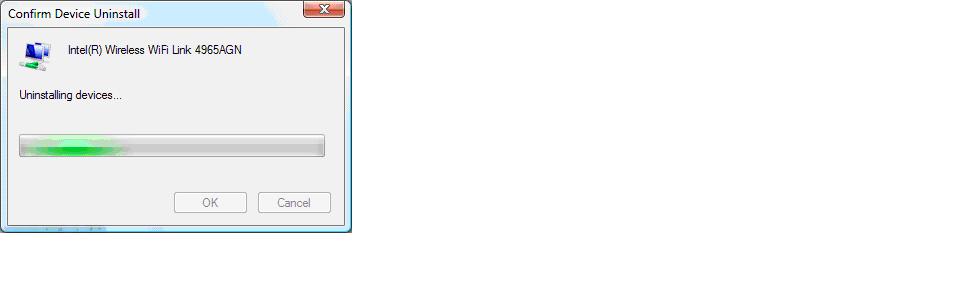
- The uninstall process begins.
- For this example, click 'Don't show this message again for this device.
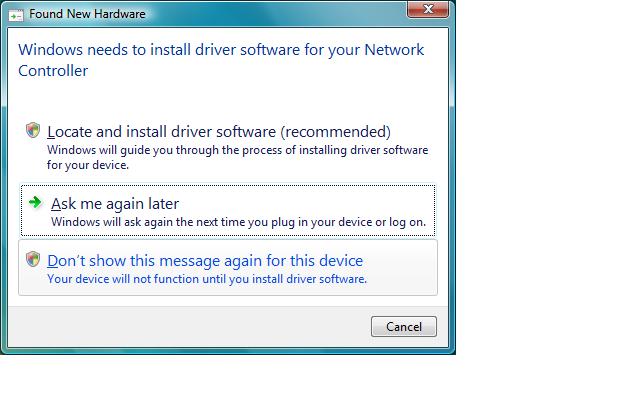
- Navigate to Start籆ontrol Panel籗ystem and Maintenance籗ystem籇evice Manager籈xpand Network Adapters and Other Devices in the right pane. You should notice the wireless adapter is no longer present and the network controller has an exclamation point icon indicating there are no drivers. You will not be able to use your adapter even though it is physically on your system. adapter

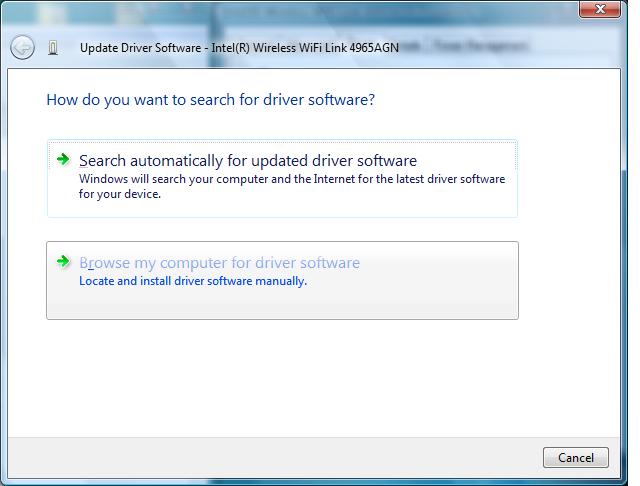
- Right-click Network Controller and click Update Driver Software in the computer management window, as shown in image above.
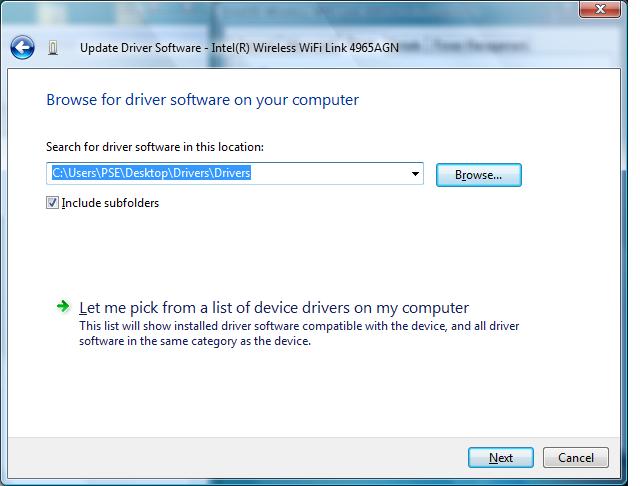
- Click 'Search automatically for updated driver software' if you have a direct connection to the Internet. Otherwise, click 'Browse my computer for driver software.' We will use the second option for this example.
- Browse for the location to which you saved your driver file(s) and click Next.
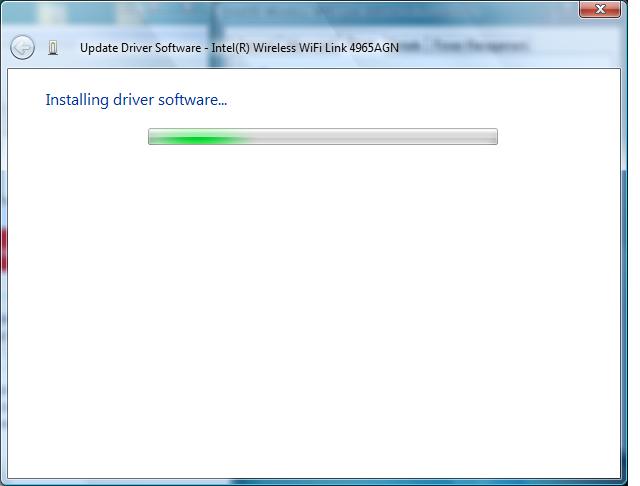
- The system begins the installation process.
- The installation is successful. Click Close.
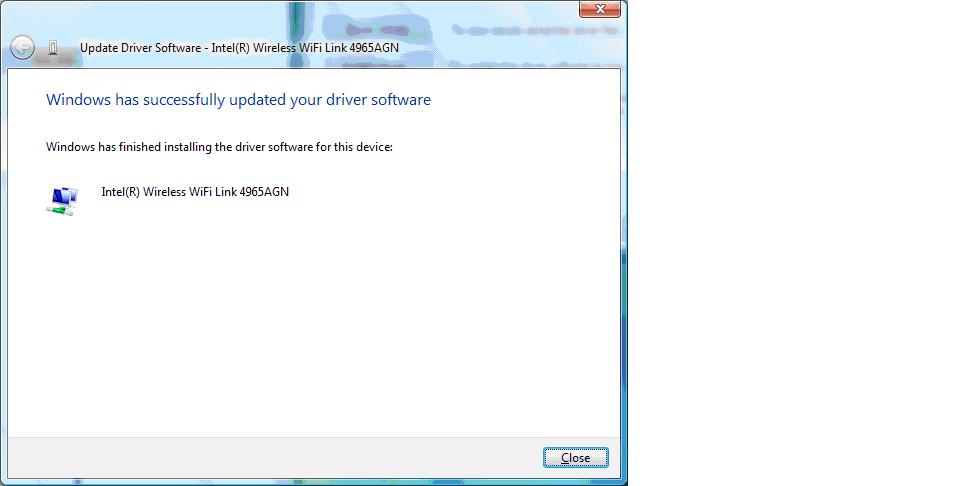
- Return to the Driver tab and notice the Driver Version is 11.1.0.71.

- If the wireless adapter fails after updating the driver, try the process again. You will not be able to roll back to a previous version because one does not exist.
The preceding driver install method is preferred. However, you may automate the process if you have a driver package from your computer manufacturer or Intel's Support Web site (generic version not recommended).
- Open the Driver folder on your computer.
- Double-click the iProdifx icon and wait for installation to complete.

- The driver version is 11.1.0.71.

Operating System:
Windows Vista* Starter, 32-bit version, Windows Vista* Home Basic, 32-bit version, Windows Vista* Home Premium, 32-bit version, Windows Vista* Business, 32-bit version, Windows Vista* Enterprise, 32-bit version, Windows Vista* Ultimate, 32-bit version, Windows Vista* Home Basic, 64-bit version, Windows Vista* Home Premium, 64-bit version, Windows Vista* Business, 64-bit version, Windows Vista* Enterprise, 64-bit version, Windows Vista* Ultimate, 64-bit version
This applies to:Intel®PRO/Wireless 2100 Network Connection
Intel®PRO/Wireless 2200BG Network Connection
Intel®PRO/Wireless 2915ABG Network Connection
Intel®PRO/Wireless 3945ABG Network Connection
Intel®Wireless WiFi Link 4965AGN