The Network and Sharing Center in Windows Vista can be used to set up a secure Wi-Fi connection to the Internet.
Note
If an Internet connection is not automatically made by the operating system, you may need to contact your access point (AP) manufacturer, broadband Wi-Fi router manufacturer, or Internet Service Provider (ISP).
Set Up a Secure Wi-Fi Connection to the Internet
These steps assume that your network adapter; AP or router; and cable, DSL or another type of modem have already been physically connected and configured. They allow you to create a new connection and configure it accordingly.
Follow these steps to set up a secure Wi-Fi connection to the Internet.
Note
If a Wi-Fi profile does not exist, you will need to Create a secure Wi-Fi profile before you can set up a Wi-Fi connection to the Internet.
- Access the Network and Sharing Center.
- Select Set up a connection or network.
- Click Connect to the Internet.

- Click Next.
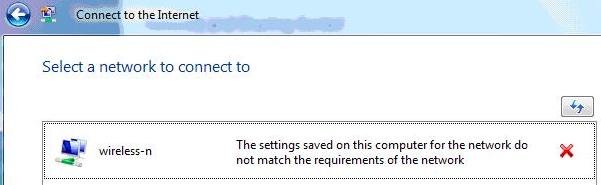
- Select Wireless. At this point, if the network(s) that are listed say that the network settings do not match the network requirements, as shown in Figure 1, Create a secure Wi-Fi profile and then follow the steps again.
- Select a network and click Connect. If you are not connected to the Internet, you may need to contact your AP/router manufacturer or ISP.
Access the Network and Sharing Center
To access the Network and Sharing Center, use one of the following methods:
- Start » Control Panel » Network and Internet » Network and Sharing Center
- Start » Network » Network and Sharing Center
- Right-click the network system tray icon (the icon that displays two computer monitors) » Network and Sharing Center
Figure 1 Network settings do not match the network requirements