Setup and Administration
Linksys has revamped the admin interface for the GS. But if, unlike me, you've been upgrading your WRT54G on a regular basis, you've already pretty much seen what you'll see for the GS' controls. You can also run a Windows-only setup utility that walks you through choosing a WAN type and other setup steps, an option that I didn't explore.
The GS comes set to 192.168.1.1 as its factory default and with its built-in DHCP server enabled. So all you'll need to do is plug in a client that's set to obtain its IP address information automatically, maybe do a DHCP release / renew (or reboot your client computer), and enter the default password into the login box that pops up. If all goes well, you'll get the main Setup screen shown in Figure 2.
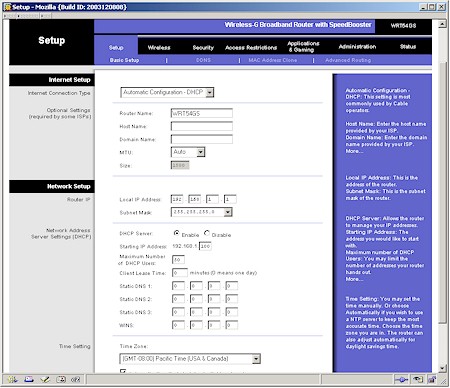
Figure 2: Setup screen
(click on the image for a full-sized view)
The selections on the Setup screen are pretty much what you're used to with Linksys routers. The Internet Configuration Type selector automatically refreshes the browser screen to present settings appropriate to the choices of Automatic Configuration - DHCP, Static IP, PPPoE, PPTP and Heartbeat Signal (for Australian users) Internet connection types.
MAC address cloning gets its own page in the Setup section, as does setting up either dynamic DNS service from dynDNS.org or TZO, setting up static routes or disabling NAT features and converting the GS to a non-NAT router. Note that Wireless setup has been moved to its own section, which I'll cover later.
The interface is generally quick, with quick mini-reboots needed to get the changes you make on each page to take. Multiple admin logins are allowed, with no warning given when two or more admins log on. Once you're logged in, there's no idle timeout, and you just need to remember to quit your browser when you're done, because there's no logout button.
Enabling Remote Management for the first time still pops up a message telling you to change the router's default password and you can now enable secure (HTTPS) admin access. You can also change the default remote admin port from 8080, but can't restrict access by IP address or domain. Also of note is that you can't reboot the GS from the Admin interface.